Summary
 Doing small tasks over and over again can really bog down your productivity. Luckily for you, Mac OS X comes with Automator, your own personal robotic assistant that will take care of whatever task you give it.
You can tell it to rename a large group of files, have it resize a batch of photos to fit in your iPhoto slideshow, automatically create iCal events, and do other things that can simplify your workflow. And you don't need to know a thing about programming to control Automator—just drag and drop commands in the interface to create your own Automator Workflows. To give you an example of how it works, here's how we created a workflow in Automator to resize our most recent batch of iPhoto pictures for the web.
To make your Mac do your dirty work, just drag any of the actions to the workflow pane.
Products Affected
Automator
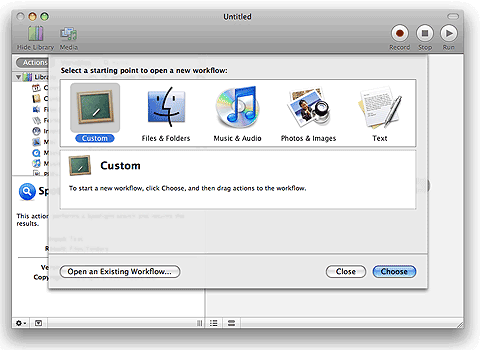
- Open Automator in the Applications folder. The interface opens with a Library column on the left for selecting applications or other items to use, an Action column in the middle containing the available actions, or commands, for your selected item, a workflow pane on the right that you drag actions here to build your Workflow, and an information box on the bottom-left to provide helpful guidance.
- Select iPhoto in the Library column.
- Drag Find iPhoto Items from the Action column to the workflow pane to add it.
- In the resulting workflow item in the workflow pane, choose Photos from the Find pop-up menu.
- In the criteria section, choose Date from the left pop-up menu, and choose This week from the right pop-up menu, this selects all images in our last iPhoto import—assuming that we run Automator in the same week that we import our pictures into iPhoto.
- Select Finder in the Library column.
- Drag the Copy Finder Items action to the workflow.
- In the resulting workflow item, choose Other from the pop-up menu and in the resulting dialog, select Desktop, click New Folder, enter a name for the folder, for example we named ours "New Web Pics", and click Create. Then click Open, this creates copies of our photos in a folder called "New Web Pics" on our Desktop to preserve the originals.
- Select Preview in the Library.
- Drag the Change Type of Images action to the workflow.
- In the resulting workflow item, choose JPEG from the To Type pop-up menu, this converts all image formats to JPEG.
- Drag the Scale Images action to the workflow.
- In the resulting workflow item, choose To Size (pixels) from the pop-up menu, and type a preferred size in the field, this resizes the longer side of all images to your specified size, while retaining the proportions.
- When finished, save your work, from the File menu, choose Save—or press Command-S.
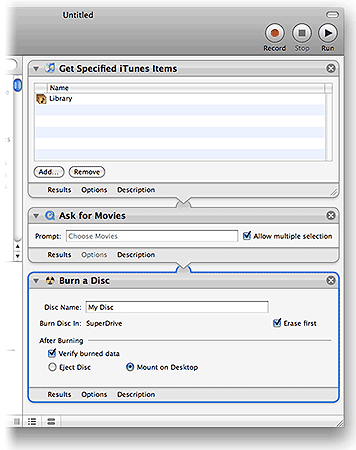
Create a workflow to help speed up your tasks.
To run your new workflow, just click the Run button at the top-right corner of the Automator window. If you prefer, you can save your workflow as an application (from the File menu, choose Save As, and be sure to choose Application from the File Format pop-up menu), which allows you to run your workflow by simply double-clicking the new application.
Tip: Want to learn more about Automator? Check out the built-in Automator Help guide on your Mac (in Automator, choose Automator Helpfrom the Help menu).