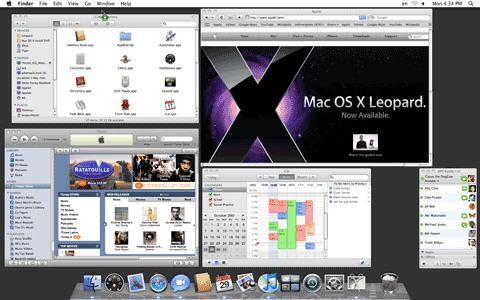
If you're looking for a more personal way to stay in touch, iChat enables you to see and hear your friends, family, and coworkers no matter how far away they are. It lets you text chat, audio chat, or video chat over the Internet without accruing any text messaging, long distance, or video streaming charges. Not only can you chat one-on-one, you can also set up a multiperson chat for work or play.
To use iChat, all you need is access to the Internet and one of the following accounts:
MobileMe,
AIM (AOL Instant Messenger),
Google Talk, or
Jabber. Here's how to set up and use iChat.

- Open iChat from the Dock or the Applications folder. A dialog opens to help you set up your account. Follow the instructions on the screen to configure iChat. If you don't have an account yet, click "Get an iChat Account" to sign up for a free one. This account will have an account name that ends with @mac.com and will work within the AIM network so you can use iChat to chat with your AIM buddies.
- Once everything's configured, iChat opens and displays the Buddy List window. This is where you'll be able to see who is available to chat once you add people to your Buddy List. Your account appears at the top; your current status should show you as being "Available." Other iChat and AIM users who've added your account to their buddy list can view your name and status in their window.
- If you want to change your status, click your status and choose a new one from the menu. You can choose one like Away or choose Custom and type your own customized status message for special occasions.
- You may also see a green "phone" icon (
 ) next to your iChat picture. If your computer has a built-in mic, or you have an external one plugged in, you may see a phone icon, which lets your fellow iChat buddies know that you're available to audio chat. If you have a built-in camera or compatible USB camera connected to your computer, or a FireWire one such as an iSight or DV camera, a movie camera icon (
 ) displays to let other iChat users know that you're available to video chat. Visit the iChat Support page for information about iChat system requirements.

To add a buddy, simply choose the type of account he or she has, and type the account name.
- To add someone to your Buddy List, choose Buddies > Add Buddy.
- In the dialog that appears, type the account name, iChat will help by searching through your Address Book, and then choose the account type from the menu. You can also type your buddy's first and last name.
- Click Add when finished. Your new buddy should appear in your Buddy List. If he or she is online, a status indicator appears next to the name. If a buddy's name appears dimmed, he or she isn't currently available to chat.

To ensure that your words convey the right emotion, pick a smiley to send along with your message.
- To start a text conversation with an available buddy, just double-click on a name in the Buddy List.
- A chat window opens. Type a message in the text box at the bottom of the window and press Return to send the message. Your buddy will receive a chat invite. If he or she wishes to chat with you, you'll receive a reply back in your chat window.
- Once you get a response, just carry on a conversation through the written word. You can send a smiley face emoticon with your message: just click the smiley face icon in the bottom-right corner and choose an icon from the pop-up menu. You can also drag or paste images into the text box to send them directly to your buddy.
- To end the chat, close the chat window.
- If you and your buddy have a built-in or external microphone and have it enabled (in the Video menu, make sure that Microphone Enabled is checkmarked), you can talk to each other over iChat just like you would on the phone. To initiate an audio chat, select your buddy in the Buddy List and click the phone button at the bottom of the window.
- An audio chat window opens on your end, and an invitation gets sent to your buddy (he or she will hear a ringing phone sound if using iChat). When he or she accepts, your Audio Chat window will show a "connecting" message, and then display a levels meter when you're connected. You're now free to gab away.
- To end the chat, close the audio chat window.
If you and your buddy have FireWire or compatible USB video cameras, you can see and hear each other over a video chat.
- If you and your iChat buddy both have built-in cameras or compatible USB cameras connected to your computers, or FireWire camera, you can video chat with each other (be sure that Camera Enabled is checkmarked in the Video menu). To initiate a video chat, select your buddy in the Buddy List window and click the movie camera button at the bottom of the window.
- A video chat window opens on your end and a video chat invitation gets sent to your buddy. When he or she accepts, you'll see his or her face in the video chat window next to yours.
- To end the chat, close the video chat window.
You can even transform your video chats using new Photo Booth effects. Add some fun to your video chat with video effects. Add some adventure to your chat with a backdrop. Just chose Show Video Effects from the Videomenu to choose an effect and your video changes instantly.
iChat Theater
With iChat Theater, you can put on a photo slideshow, click through a Keynote presentation, or play a movie while your buddy looks on.
- From the File menu select "Share a File with iChat Theater…".
- Navigate to the file you would like to share, it can be a QuickTime movie, picture, Keynote document, or any other document that can be opened by Quick Look.
- Click "Share." Note: You can also select "Share iPhoto with iChat Theater…" after navigating to the photo or photo album you would like to share in a photo slide show.
- You will then see a dialog box instructing you to "Invite a buddy to a video chat."
- Highlight the buddies you would like to send the iChat Theater to and then choose Buddies > Invite to Video Chat.
- Once the invite is accepted, your buddies will be able to enjoy your content and talk to you about it. This easily enables collaboration on projects.
- You control the show: You can scroll up and down through a document or go to the next page. With movies, you can control the volume, click play or pause as well as where in the movie you want to play.
- Just close the Video Chat window to end the session.
Multiperson iChat
iChat allows you to multiperson chat with video and even share your computer screen!
- Select the buddies that you want to participate in your multiperson chat (hold down the Command key to select more than one buddy).
- Click the A button at the bottom of the buddy list window to start a text chat, the phone button to start an audio chat, or the movie camera button to start a video chat.
- As your participants accept your invitation, they will be able to send text, talk, or visually interact with everyone who joins.
- Anyone can leave the chat at anytime by closing the chat window. The chat will continue as long as the person who initiated the multiperson chat keeps his or her chat window open.
Screen Sharing
You and your buddy can observe and control a single desktop with iChat, making it a cinch to collaborate with a colleague, browse the web with a friend, or pick plane seats with your spouse. Share your own desktop or your buddy’s — you both have control at all times. And iChat automatically initiates an audio chat when you start a screen sharing session, so you can talk things through while you’re at it.
- Select the buddy with which you want to share your screen.
- Choose Buddies > Share my screen with… to enable your buddy to observe and control your screen or Choose Buddies > Ask to share… to have your buddy receive a screen sharing invite.
- On the controlled system, once the invite is accepted a screen-wide banner will briefly show. You will also see the iChat status menu bar item alternating to a red screen sharing icon. Tip: Click Text Reply on your invite notifier to cancel the screen sharing invite, but then send a text chat to explain why you declined the invitation.
- On the controlling system, once you have control of the other system, your desktop will be minimized into a picture-in-picture frame. Click this frame to roll your desktop back into the foreground. Repeat this process as needed to change the screen in the foreground.
- To end the screen sharing, hit control-escape or click the x icon in the upper left-hand side of the picture-in-picture window or select End Screen Sharing from the iChat status menu bar item.
Tip: Want to learn more about iChat? Check out the built-in iChat Help guide on your Mac (in iChat, choose iChat Help from the Help menu).
 If you want to quickly assemble a few video clips or fine-tune your masterpiece, iMovie is the perfect place to do it all. Plug in virtually any digital camcorder and iMovie starts importing your video. Drag and drop to create sophisticated edits, dazzling special effects, and smooth transitions. Integrate cool sound effects or add your own rocking soundtrack made with GarageBand, then share your movie with the world. Here's an introduction to movie-making the iMovie way.
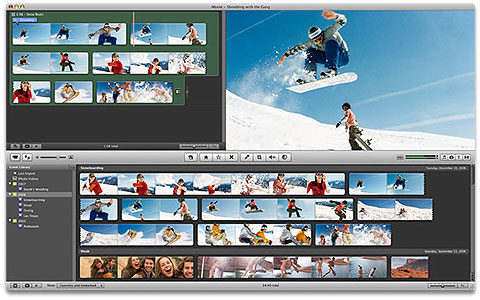
 If your Mac has a SuperDrive, you can create professional quality DVDs that rival the movie discs that Hollywood offers. iDVD comes with several templates that let you design multimedia DVDs showcasing your movies, photos, and music. It integrates seamlessly with iMovie, iPhoto, and iTunes to give you access to all your media as you put together your DVD. Here's how to use it to create your own multimedia DVD.
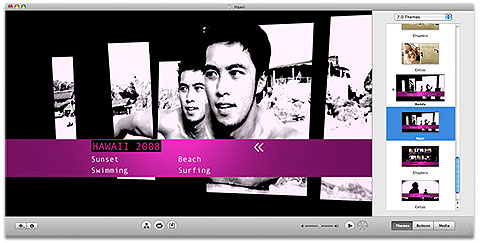


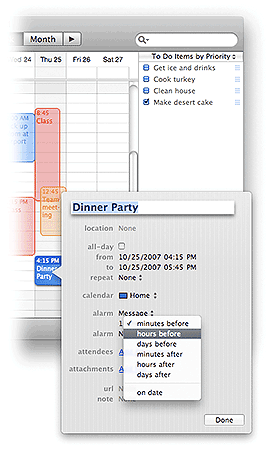
 If you need help managing your life and time more wisely, iCal provides all the tools you need to keep track of schedules, appointments, birthdays, to-do lists, and other important events—not just yours, but anyone else's iCal calendar too. Your calendars and others that you subscribe to all cohabitate with each other in your iCal view pane, allowing you to see where potential scheduling conflicts may occur. Here's how to set up various events in iCal, and subscribe to other calendars.
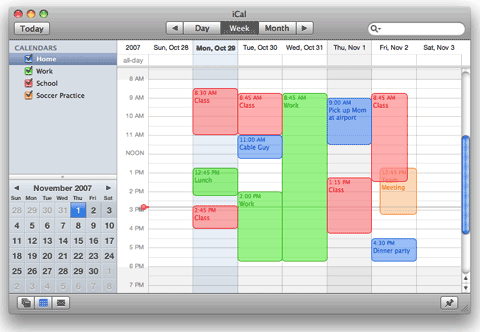
 Apple computers have long been the tool of choice for recording professionals around the world, but you don't need thousands of dollars worth of gear and a record producer to make professional-sounding recordings. With GarageBand, all you need is an appreciation for music.
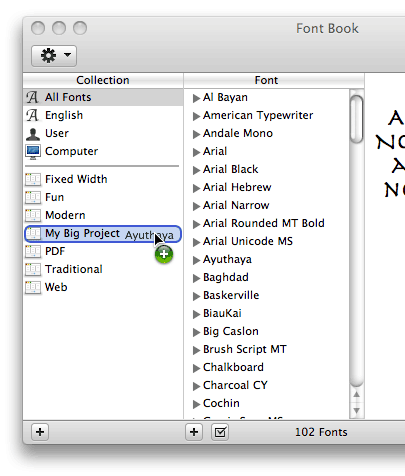
 Your Mac comes with many preinstalled fonts, styles of type that your computer uses to display and print text. Use Font Book to sort and preview your font collections to find the right one to use for your project.
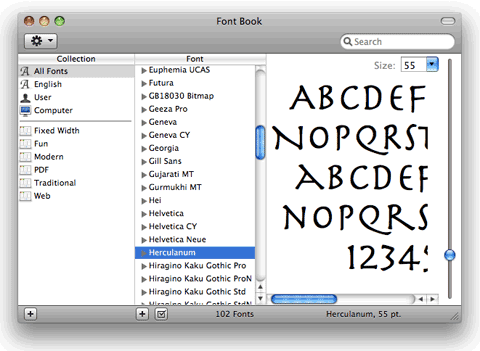
 When you're heavily involved in your tasks, it's easy to clutter your Desktop with an array of Finder and application windows. Rather than hunt and click through the pile to find the one you're looking for, use Exposé instead.